How to Install Ubuntu Os Step by Step Pdf
How To Dual Boot Windows 10 And Linux (Ubuntu — 20.04 LTS) In A Few Hassle-Free Steps
Easy Installation Tips and Tricks
![]()
Windows is by far the most widely used operating system in the world today. It has been consistently occupying more than 70 % of the PC Operating System market for several years (Source: Statista). And naturally so. Most people who use PCs are not developers. So they need off the shelf software and user interfaces for most purposes. Why then, would you need to use Linux Distro like Ubuntu?
If you are a developer/data scientist, you probably are already using Linux for some of its many advantages like:
- Speed — Linux is lightning fast, which is why most of the fastest computers in the world use it. If you are wrangling with large amounts of data, this is a definite advantage.
- Flexibility — Linux is highly flexible, in that you can run almost everything. That too with very little resources consumed as compared to windows. Accessing and processing data is much easier even with older hardware.
- Developer friendliness — It is a given that Linux is developer-friendly. With the open-source nature, anyone can contribute to improvements. Also, the ability to use Dockers is a definite advantage. You can run algorithms within multiple containers in parallel and with ease.
If you are n o t a hardcore developer, but having some amount of IT affinity, it is still worth to try one of the many Linux Distros available. Ubuntu, a Debian based distribution, is a favorite among Linux beginners because of the ease of installation and use. And with Microsoft changing its long term stand by being more open to open-source platforms and Linux (see WSL, if you do not want a dual boot but use GNU/Linux directly in Windows. Yes, at one point in time unimaginable, that is a possibility now!), it is probably a good idea to invest your time and have Linux under your knowledge belt as well.
Last week I installed the latest version of Ubuntu (20.04 LTS) on my PC and I had to do it again on one more. So I thought I might as well write about how I did it here so that all readers on Medium can find it helpful. This is how I did it.
Starter Kit:
- Windows 10 PC (should work in the same way for Win 7, 8, Vista with a few modifications in the steps)
- Ubuntu 20.04 (Link to versions page)
- Around 20 GB of disk space to spare
- USB Flash Drive (8–16 GB)
- Rufus — a software to create bootable USB (link)
Once you have these, let us begin.
Step 1: Creating a bootable USB with Ubuntu
Insert your USB drive and check if the connection is without any errors. You should not have any data in the USB drive, as any data will be overwritten. Please back up any important data.
Now start the Rufus software that you downloaded (I used version 3.13 from here).
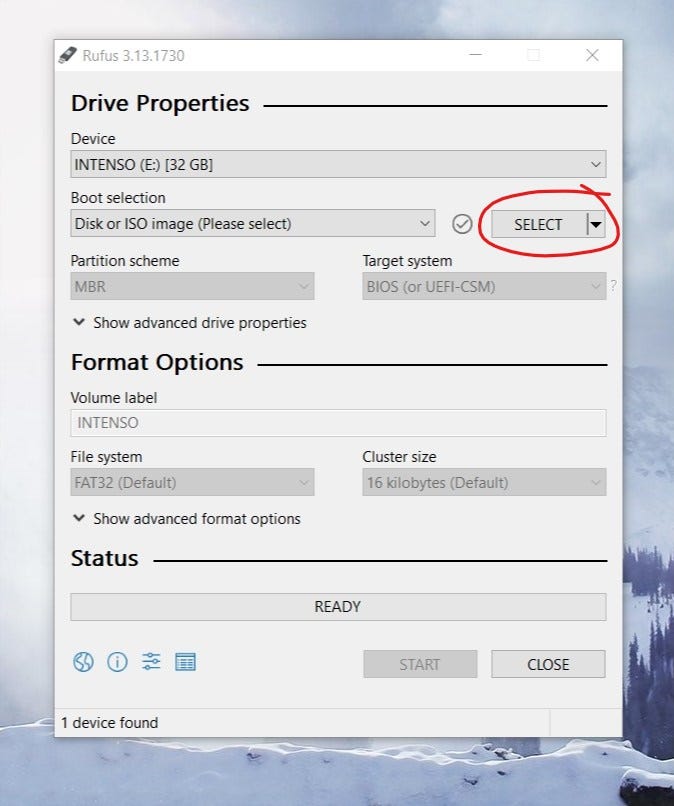
It will automatically detect the USB drive inserted. Once you click on select, you will get a browse window to go to the Ubuntu ISO file that you downloaded.

After you select the file from your downloads, you may get a few of the following options based on your initial settings. Select as red-outlined in the image below.
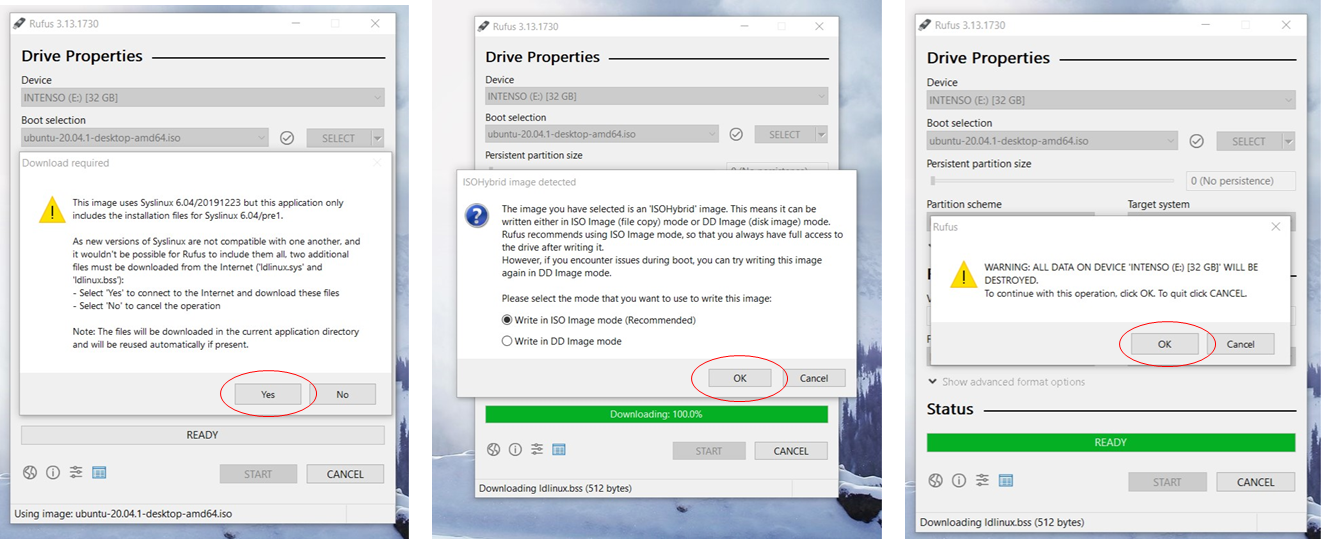
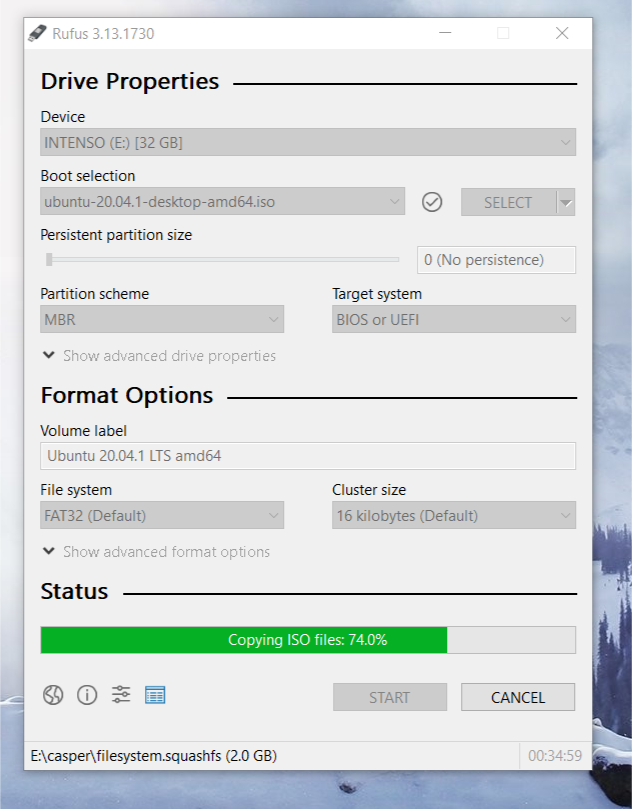
After this, you are ready to go. Click on start and wait, this should take a couple of minutes based on the drive writing speed.
Once you are finished with this, safely unmount the USB drive and mount it again to check if everything works fine. The drive would have been labeled now as UBUNTU 20_0 ([your drive letter:]) by default.
Step 2: Disk Space Allocation
To see your disk space, press Window key + R and type diskmgmt.msc in the application. This will get you to your Disk Management.
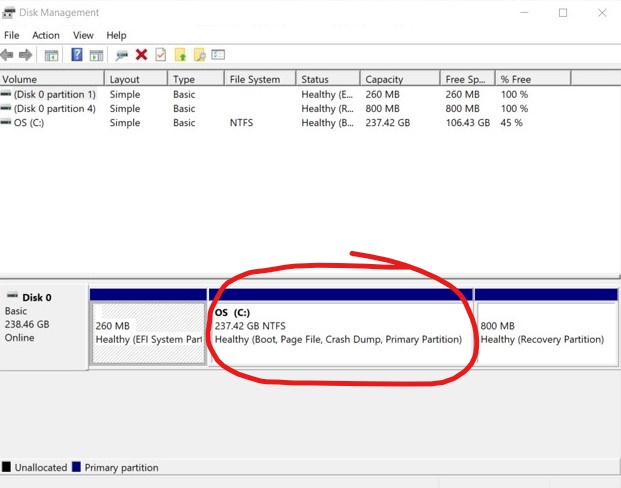
I have the Windows Installation on Disk 0 — OS (C:) and also some amount of data. Right-click on it and select shrink volume.
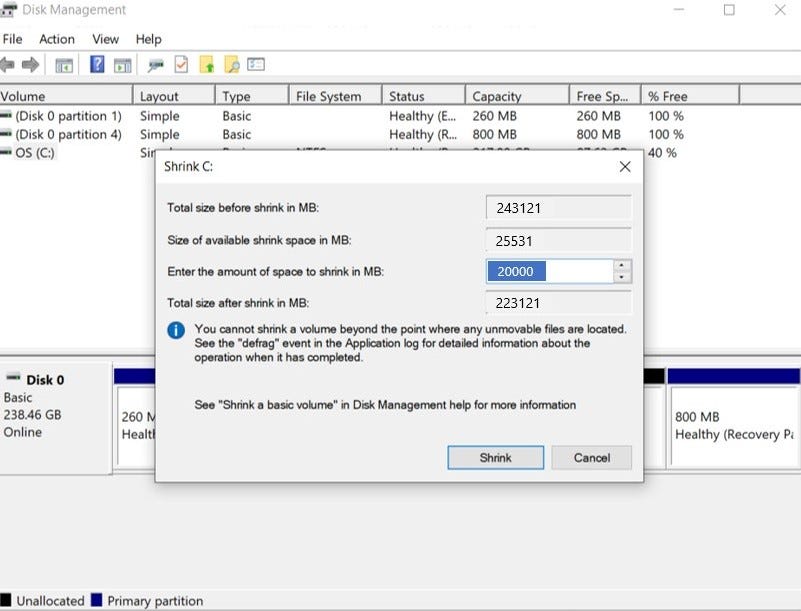
I want approximately 20 GB of free space for the Ubuntu installation, so I have entered the amount to shrink in MB as 20,000. You can vary it depending on your space availability. After you shrink, you should be able to see this as unallocated space as seen below.
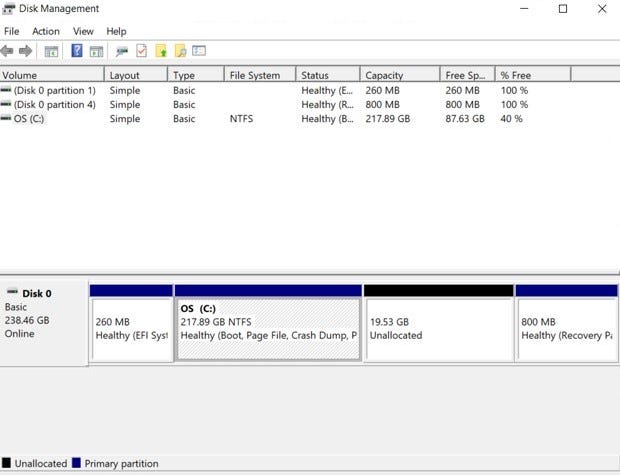
That is it, you have a new unallocated partition for your Linux installation.
As always, it is a good practice to back up any data that is there on the drive.
Also a very important note of caution here: To install any Linux distribution, the disk type should be Basic as only this type is supported. However, trying to create too many partitions(4 or more) will convert the disk type inadvertently to Dynamic. If you have any data in Disk 0 (especially a Windows Recovery Drive), converting back to Basic type is very tedious. You will have to format the disk (in the case of C-Drive, you would have to reinstall Windows), and you will lose the recovery partition in most cases.
The only way I found to convert Dynamic to Basic without formatting is with a software called Paragon . The community version is free to use and works surprisingly well. You can alternatively use this software to create a partition as well.
Step 3: Installation
Now that you have successfully allocated free space in your drive with partitioning, we can start the installation process.
Here is the complete walkthrough with screenshots.
Connect the USB Flash, make sure it is detected and that you can see it as a drive. Restart your PC. Before it boots, press Esc or F2 repeatedly. You will see a screen as follows:
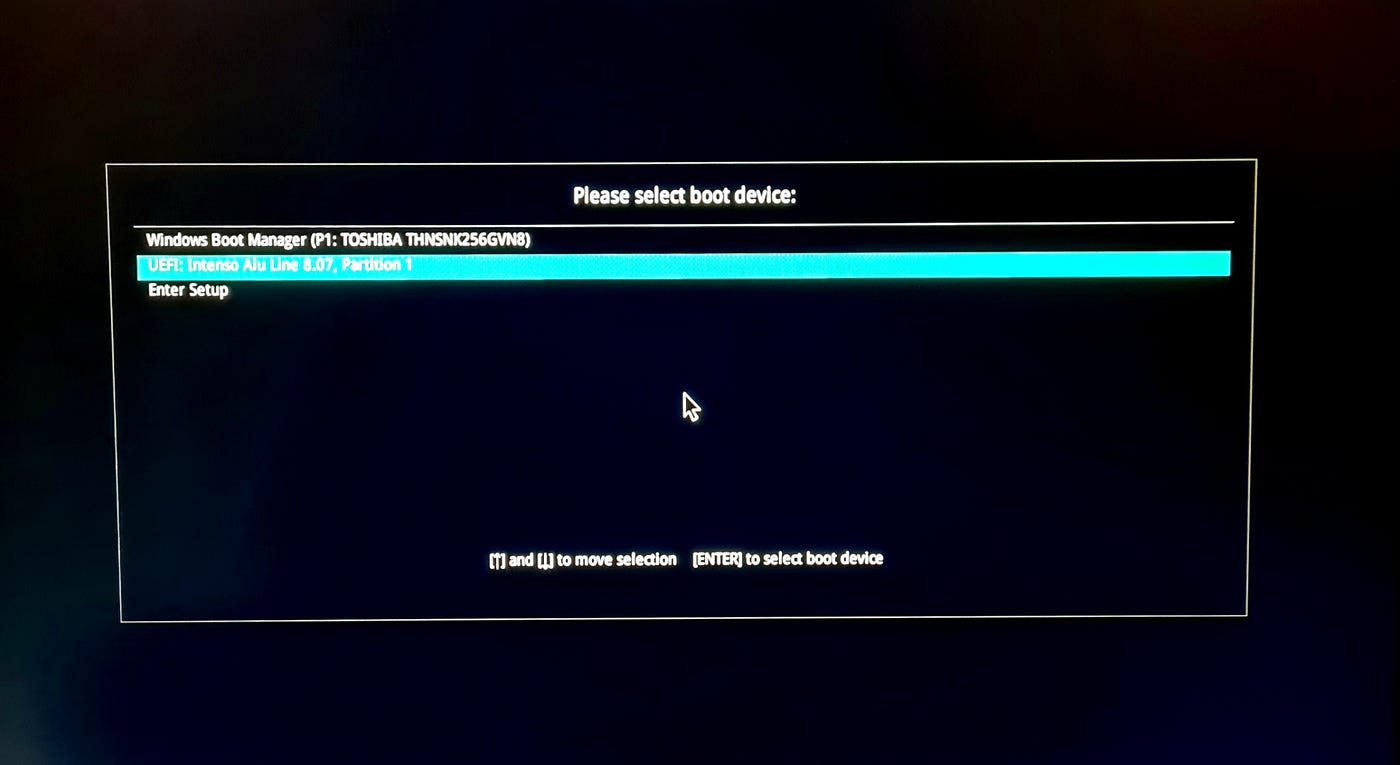
Select the boot device as your USB Drive and press Enter. You should see a screen as seen here:

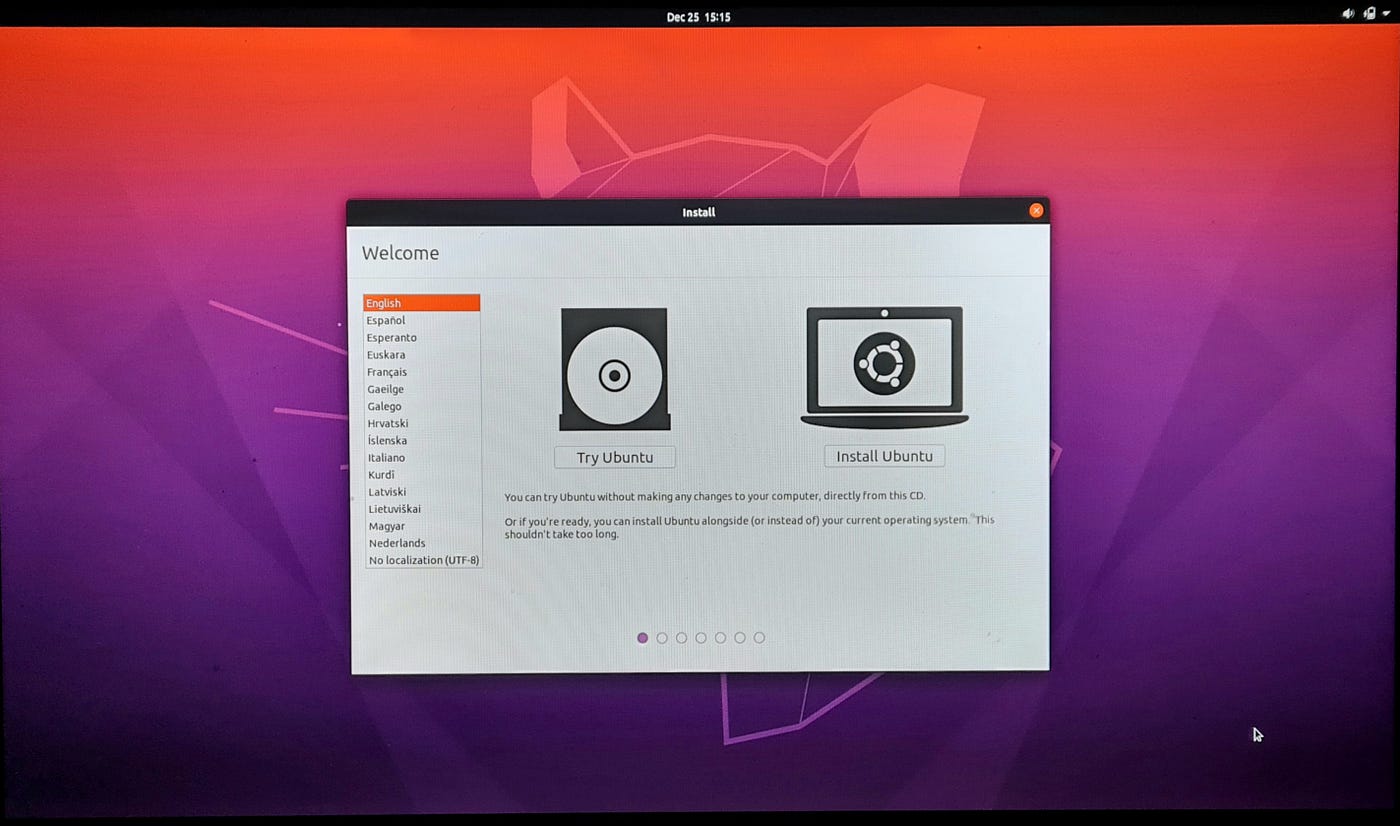
From here, it is just a few clicks for the basic setup which are shown below:
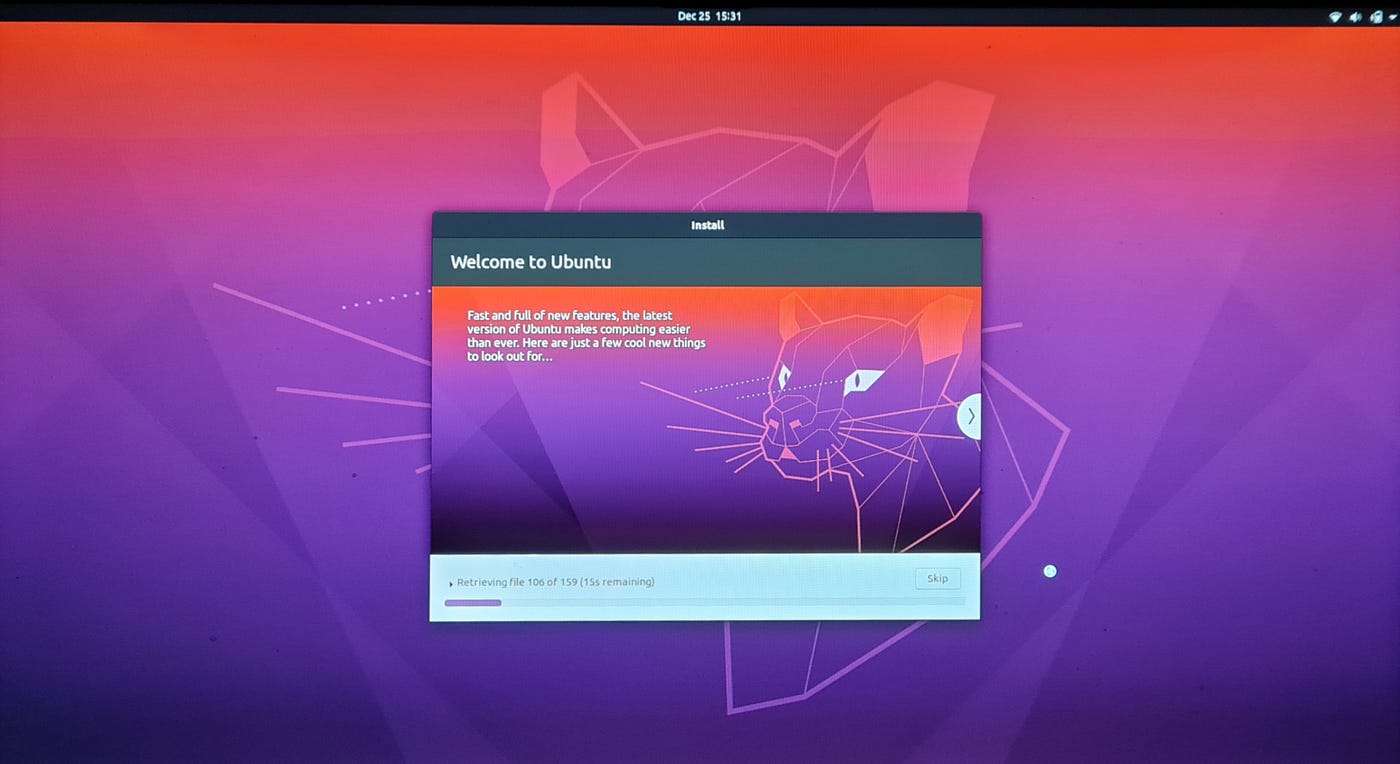
Select Install Ubuntu option (if you want to try, you can actually use the Try Ubuntu option which still gives you the full capabilities. The only hassle is that you would have to connect your USB flash drive every time you want to use it).
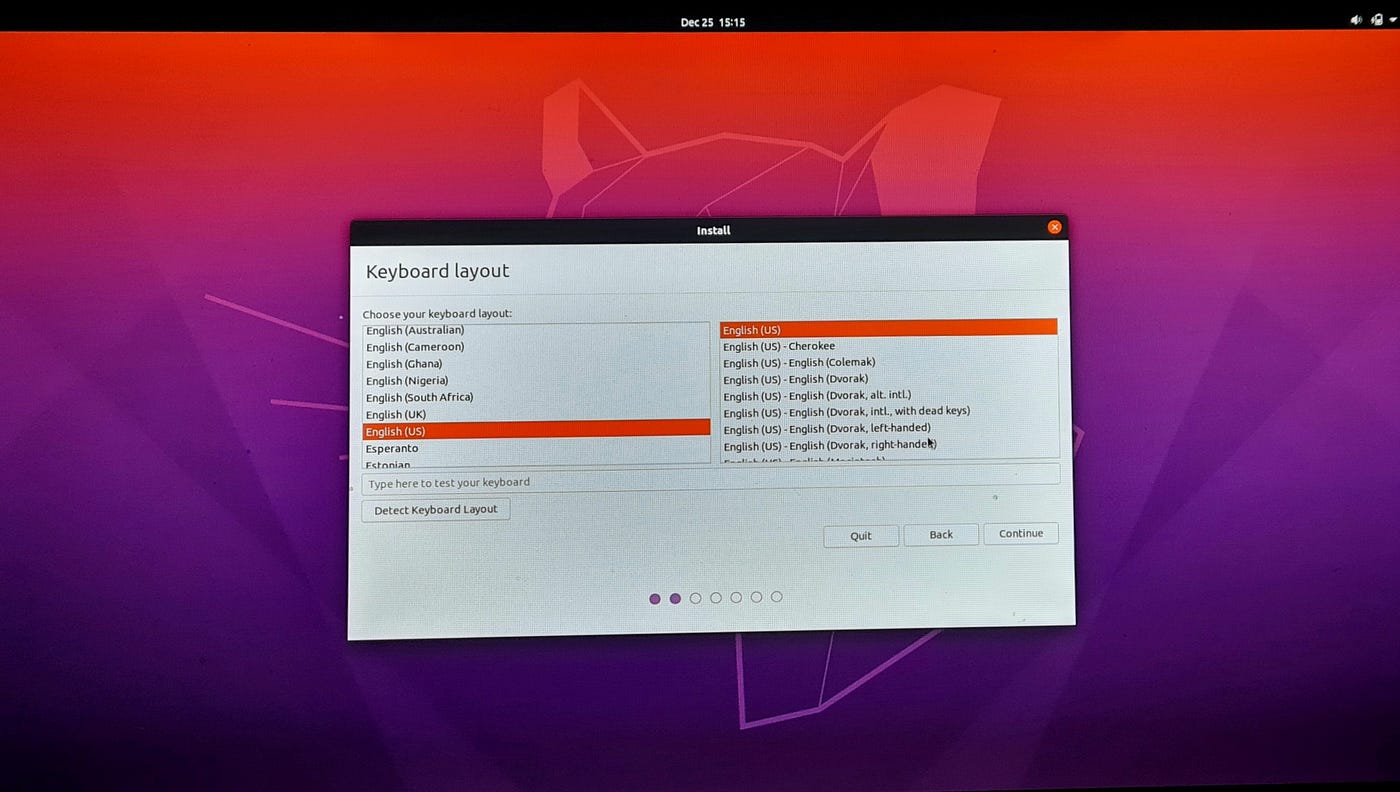
Select language.
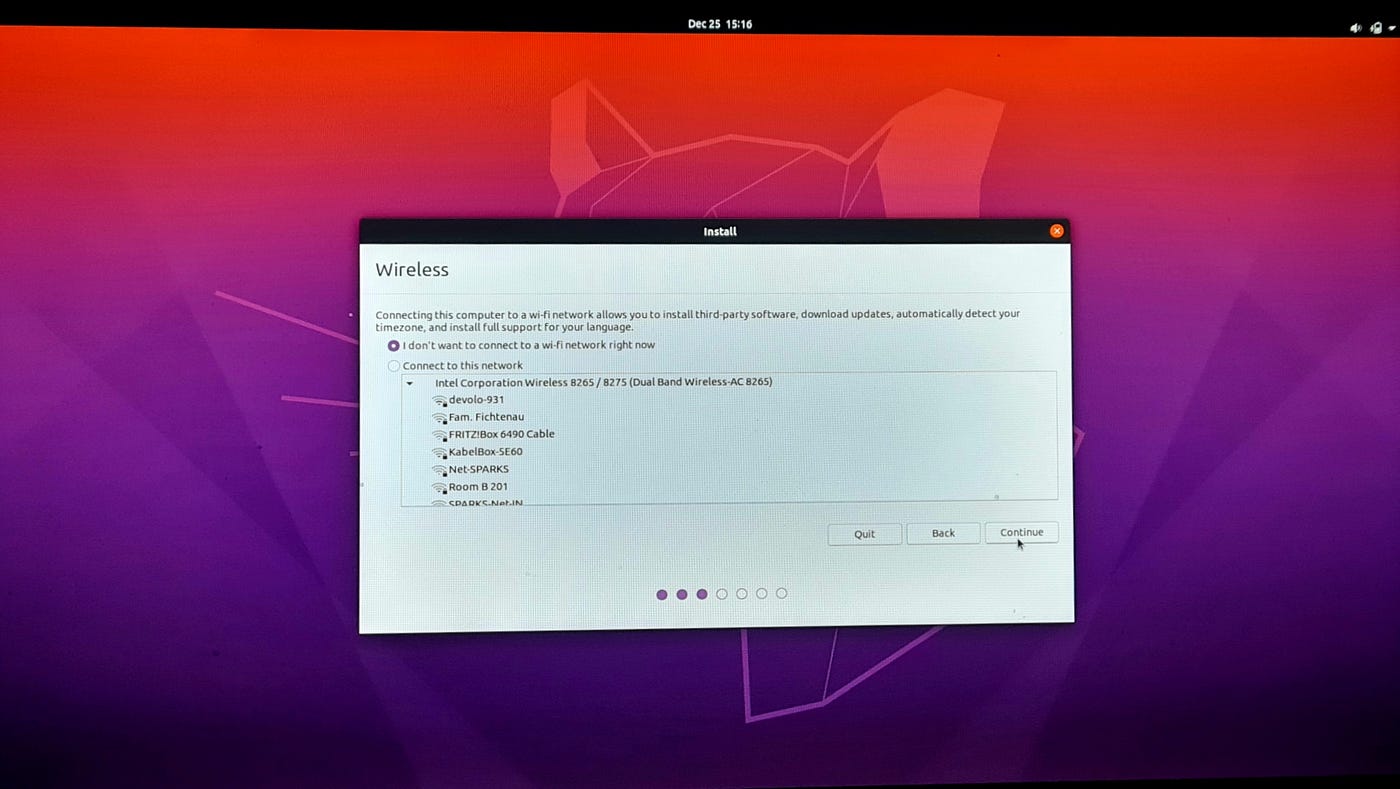
Connect to your Wi-Fi (optional but recommended as the packages and updates will be installed).

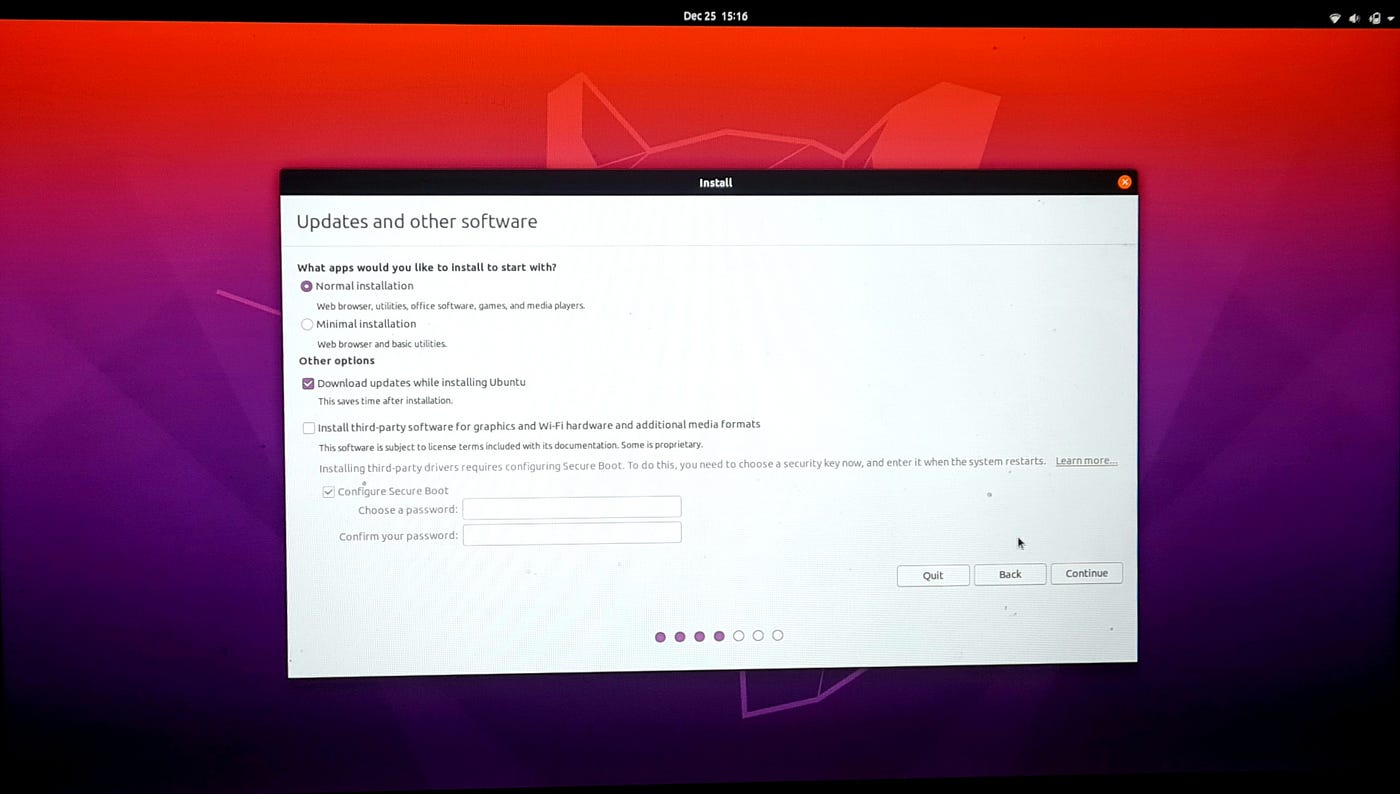
When you are connected, you will see the screen as seen below. Also tick the option for install third-party software (includes codecs e.g. MP3, Flash, etc.)
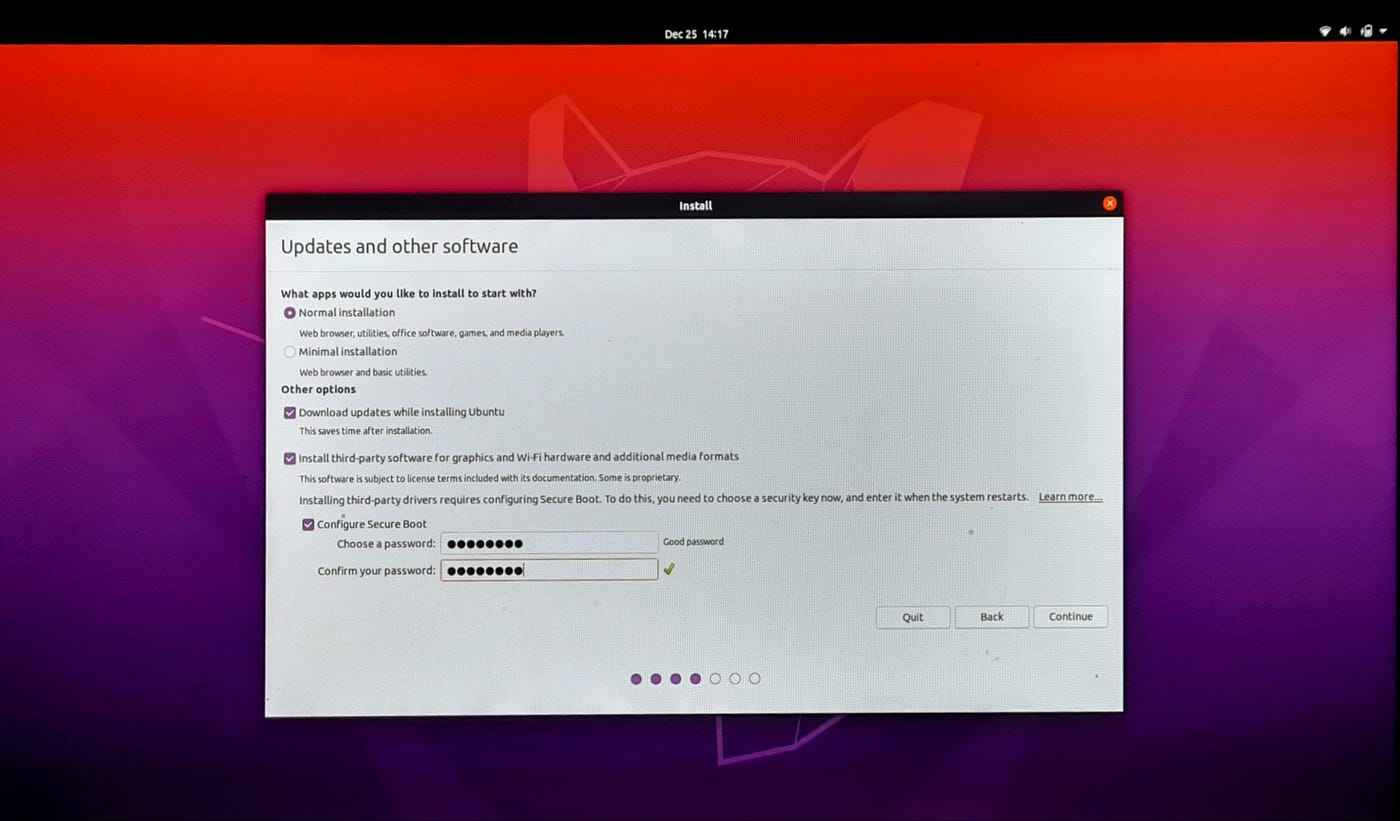
Next, you will be asked to create a password for secure boot. This is different from the actual login password that will come later. This password is not needed much, but please keep it handy as it is required if you install anything that might change the boot loader.
From here on begins the tricky part. You have 3 Options:
- Install alongside Windows Boot Manager — This will automatically do the partition for you, but you do not get an option for personalized partitioning, nor the option of where to install the boot loader.
- Erase disk and install Ubuntu — You probably don't want to do this as it will erase your windows installation.
- Something else — This is what we will go for, as we have created a free space partition for this purpose.

You will get a window as follows. As you can see, there is a free space of around 20 GB listed there. This is what we will use.
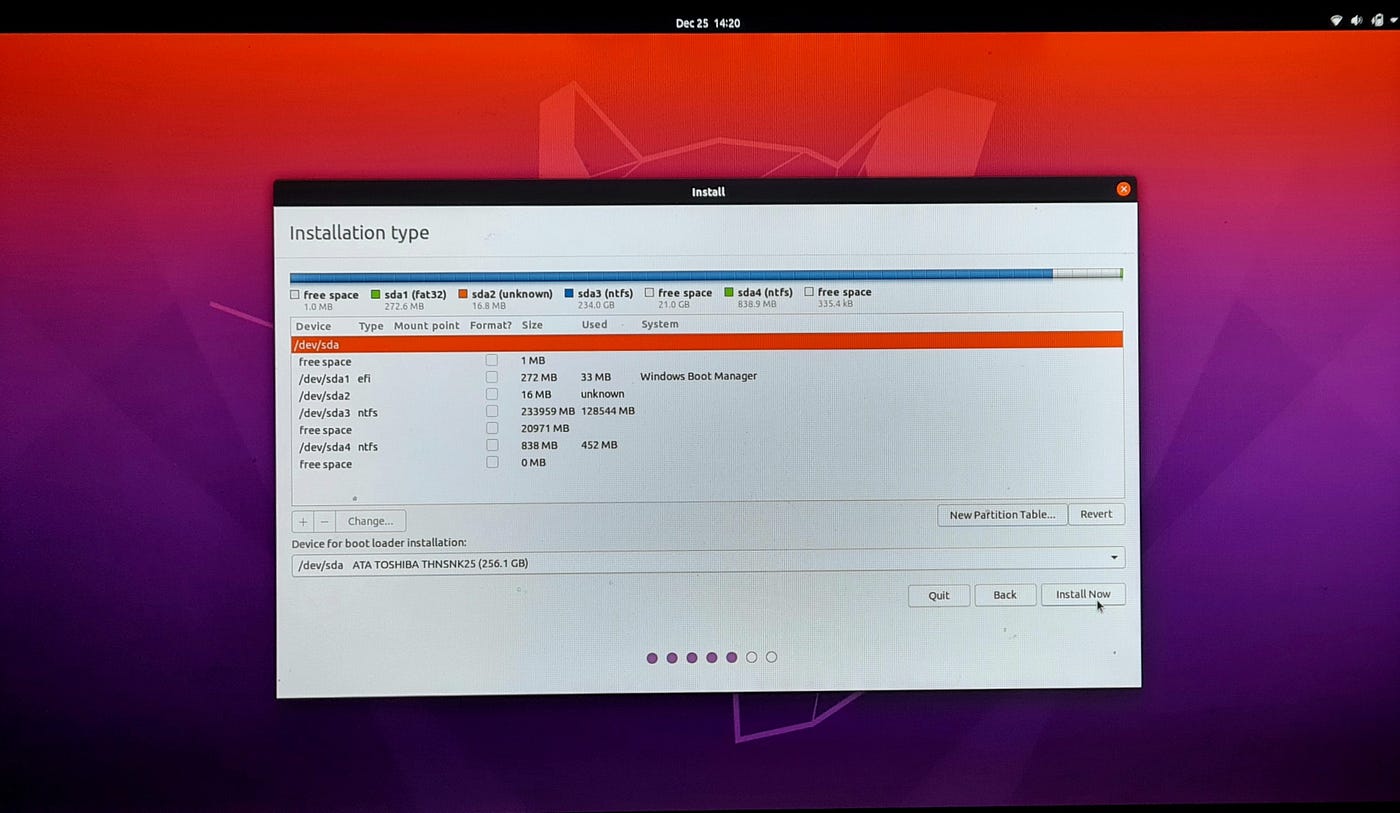
Select the free space.
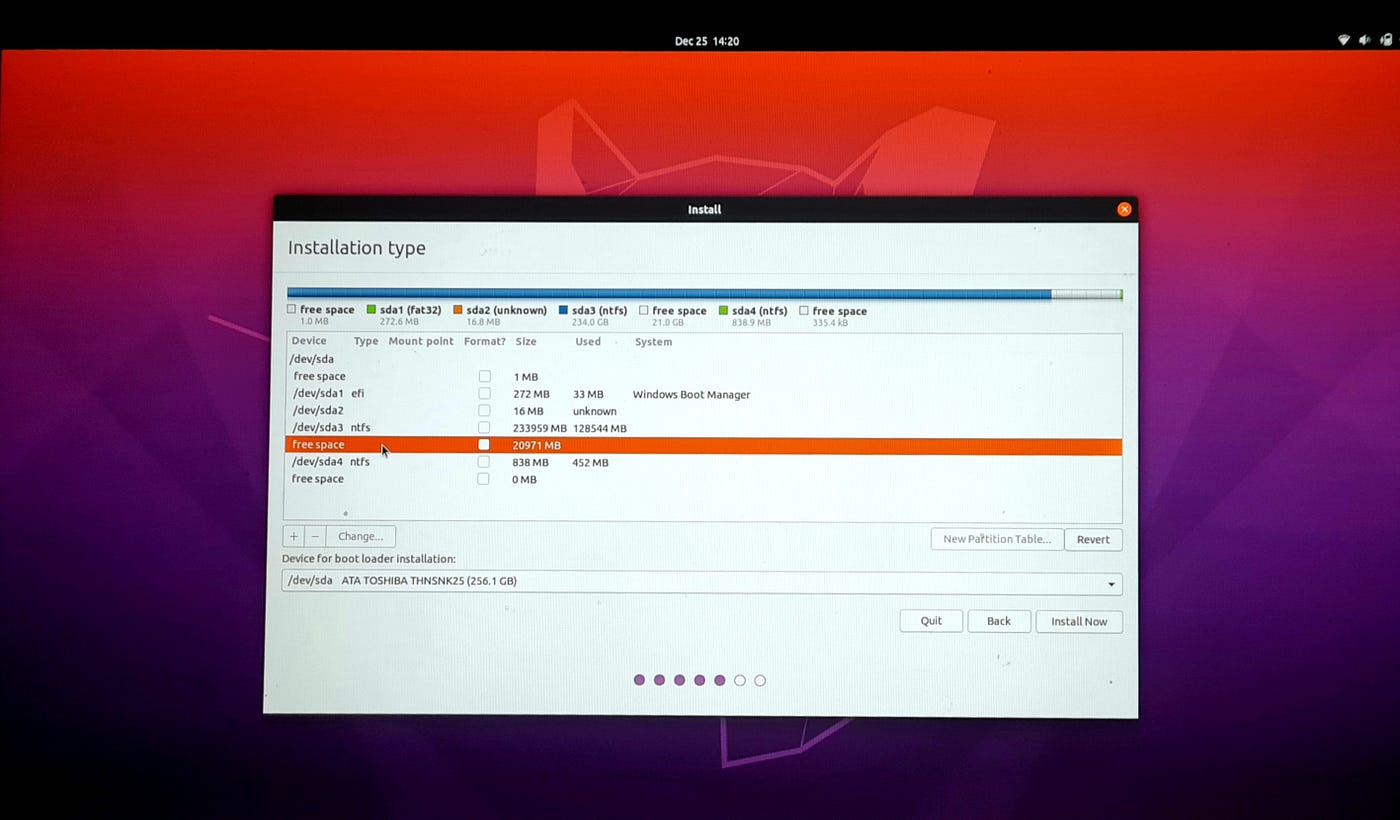
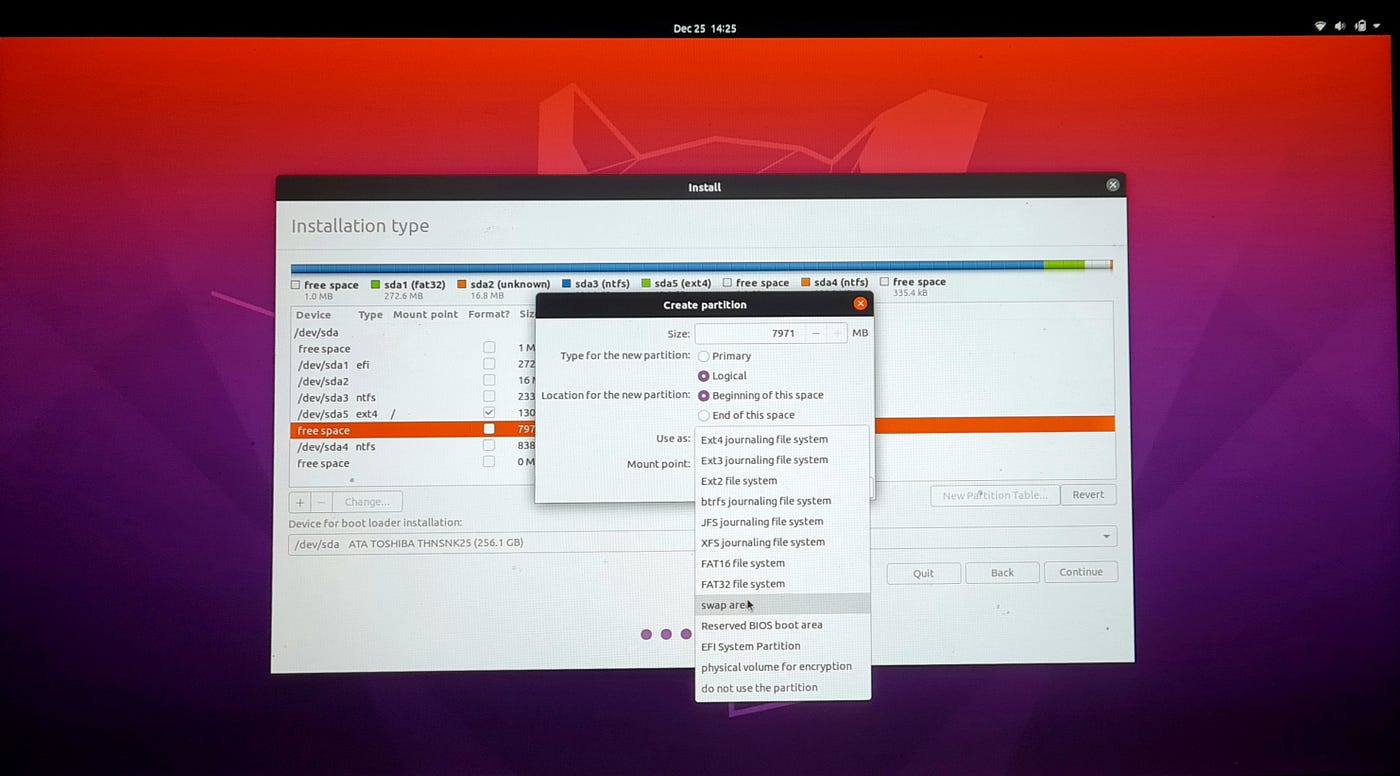
Click on the + at the bottom left corner, as indicated by the mouse pointer in the picture below. You will get the options for the partition.
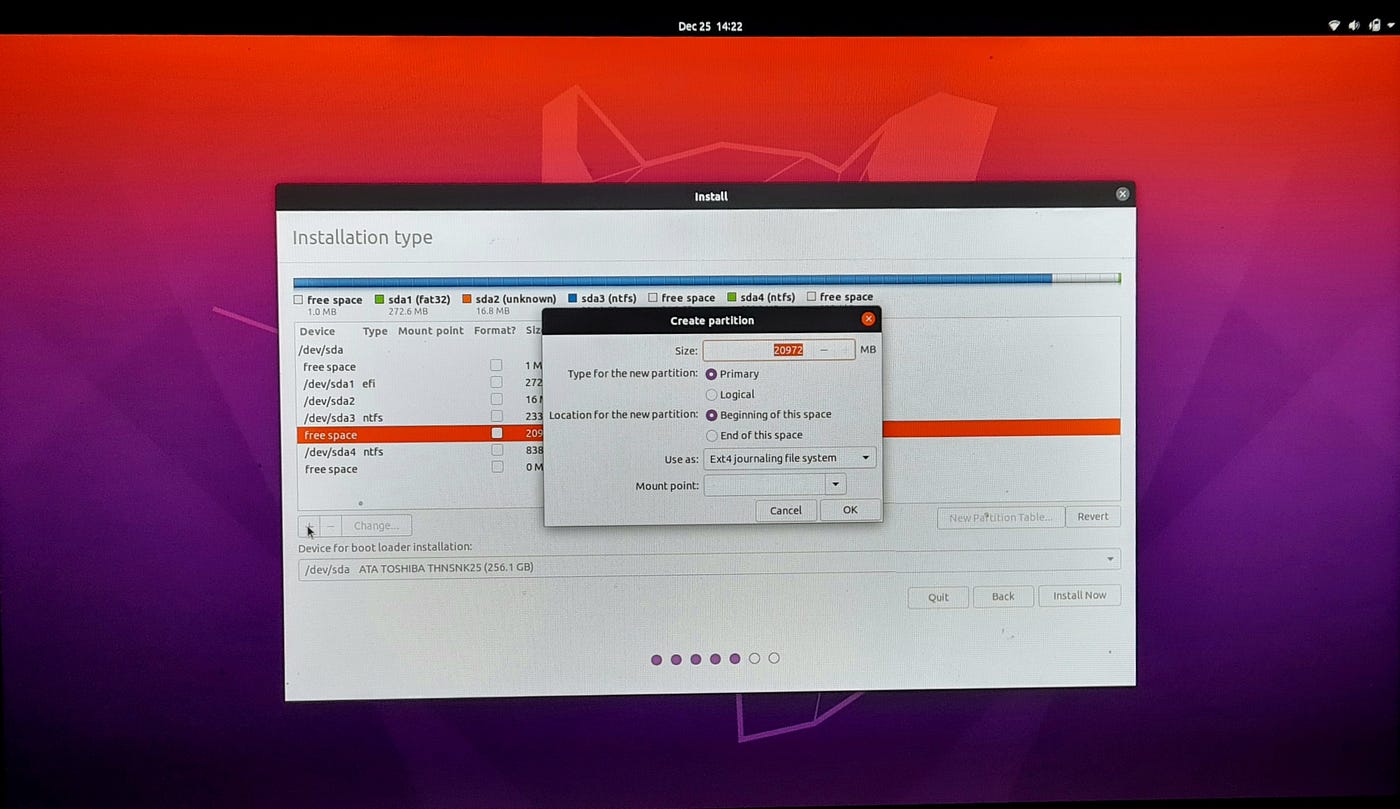
We have about 20 GB available. From that, I have used 13 GB for use as the ext4 file system. Select the partition type as Logical and the mount point as a '/' as indicated in the image. Click Ok.
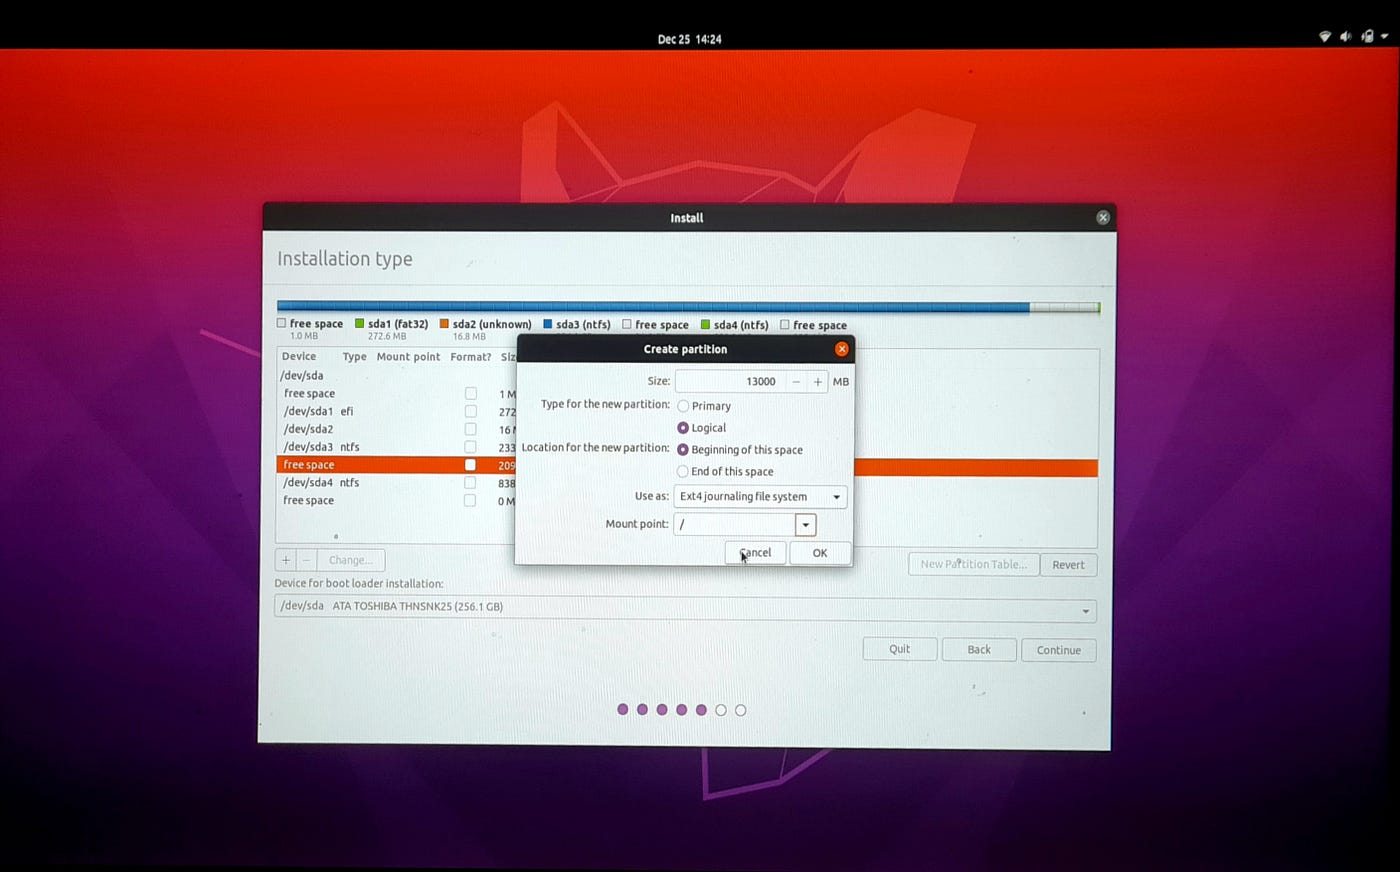
After that, go back to the free space seen again, this is approx. 7 GB in this case and click on + again to create a new partition. This one will be used as the swap (a kind of backup RAM).
Once done, click ok.
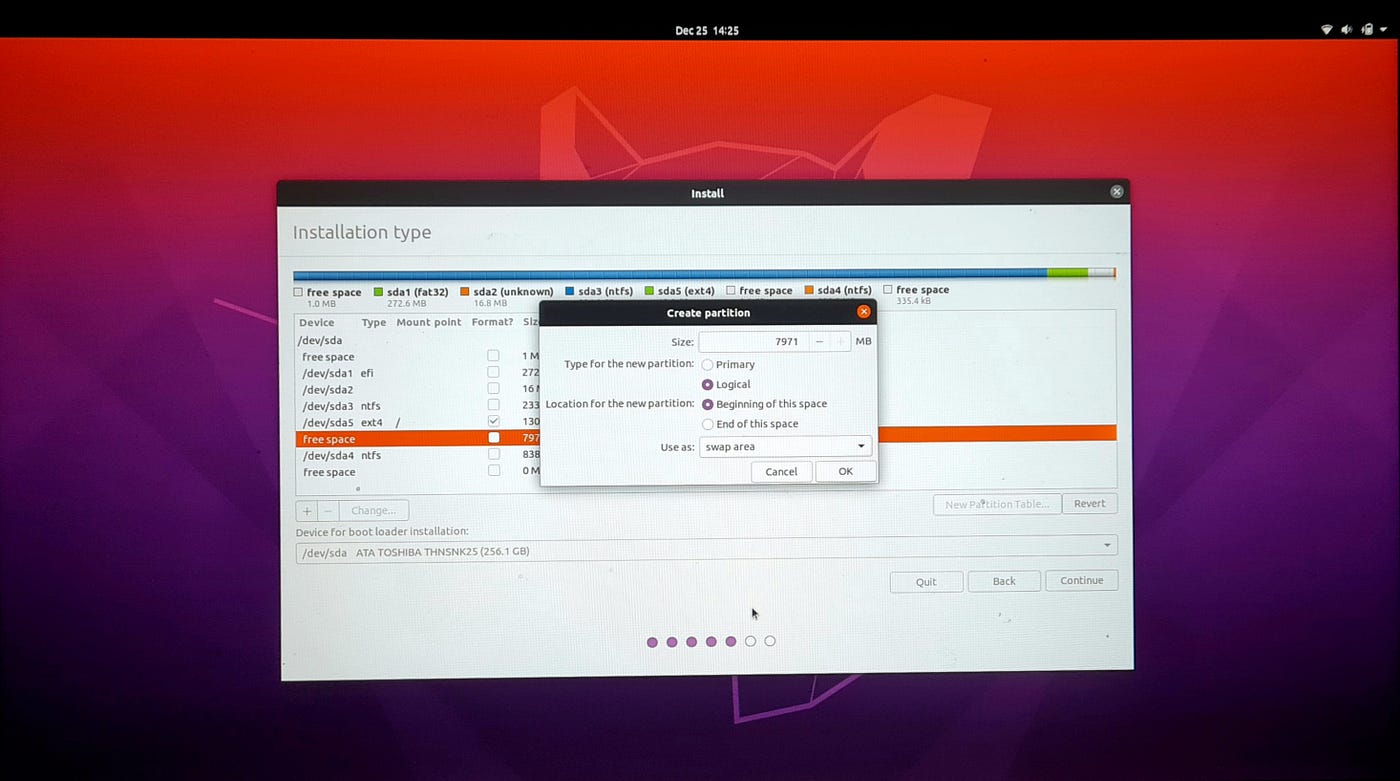
Now, in the option at the bottom, which says Device for Boot Loader Installation, select the ext4 partition that was created, in this case, it is /dev/sda5.

After this selection. Click install now and continue.

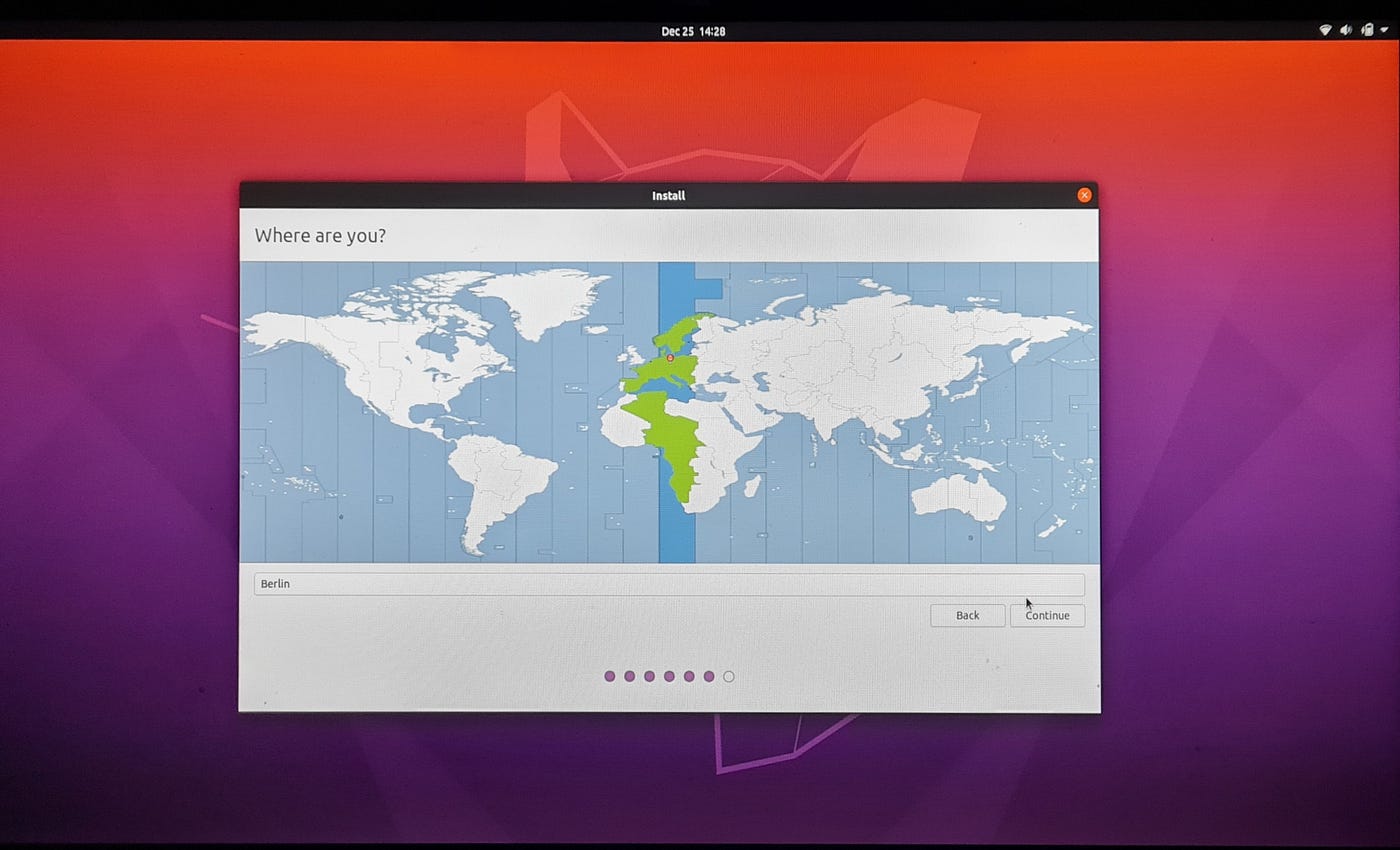
You will have the option to select the approximate region.
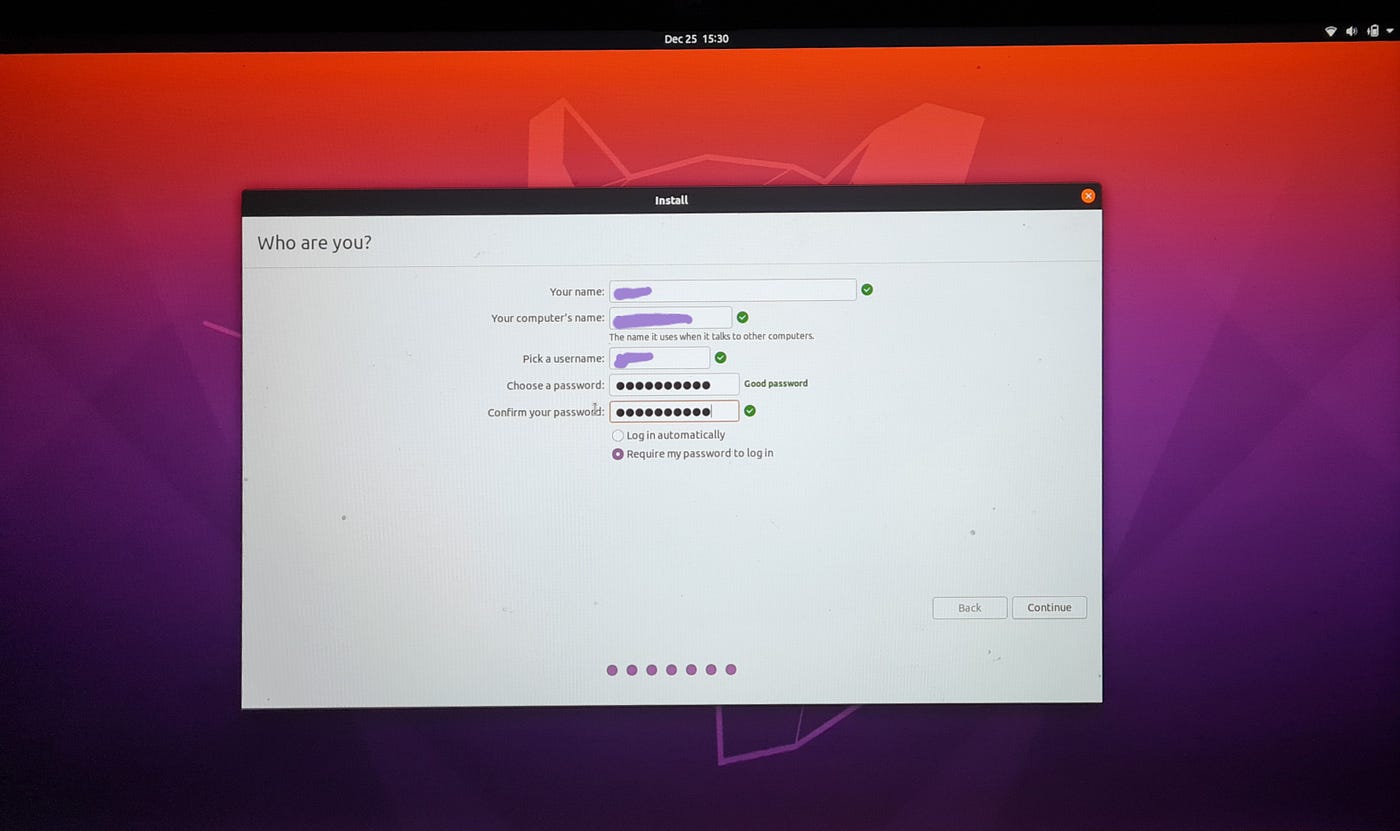
Next, you can create a login and password. This password will be used for login and also when you have to install new applications.
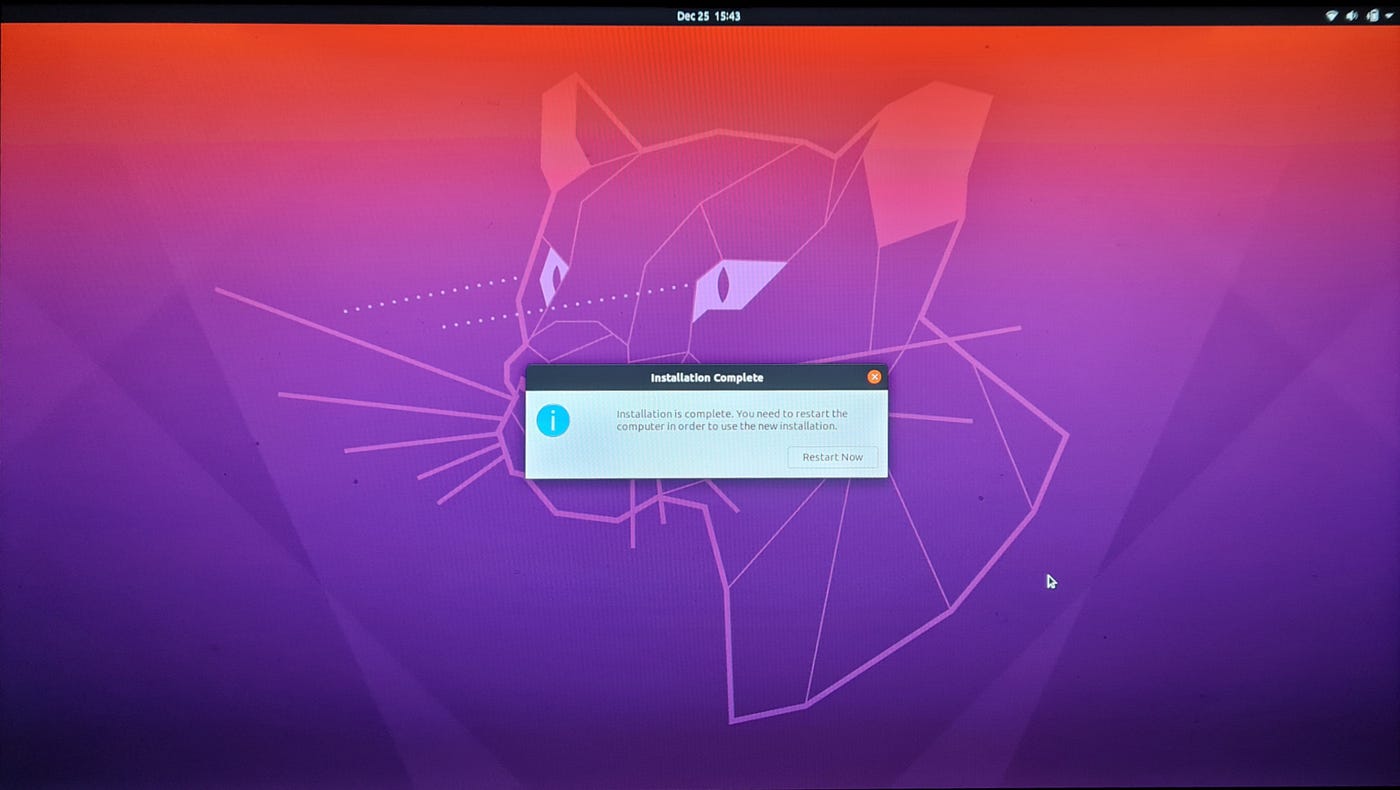
Continue and the installation will begin. This will take a couple of minutes.
Once done, click Restart Now.
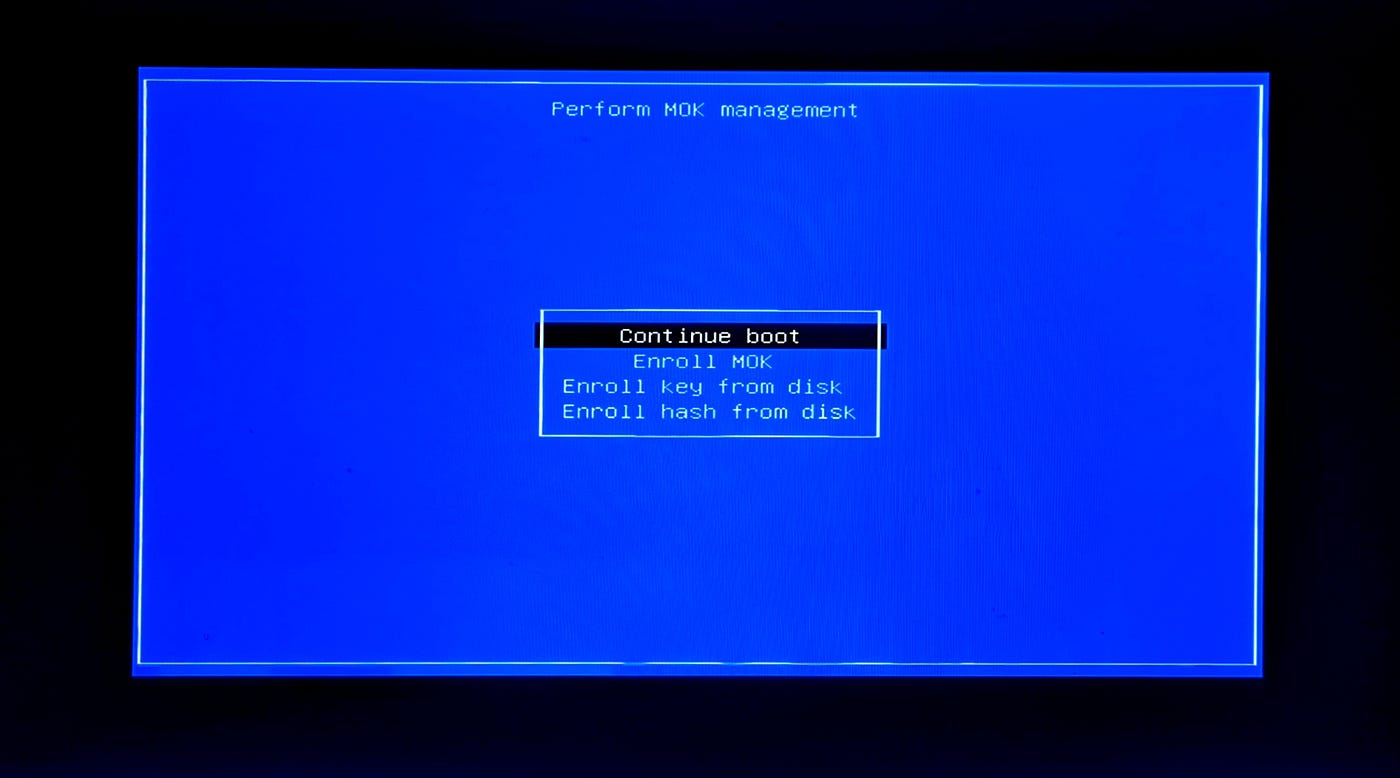
After this, you may also see a window saying remove disk and press Enter. In this case remove the USB Flash drive, press Enter.

Once done, you press Enter for each of the following.
There you go, almost done. Log in with your password.
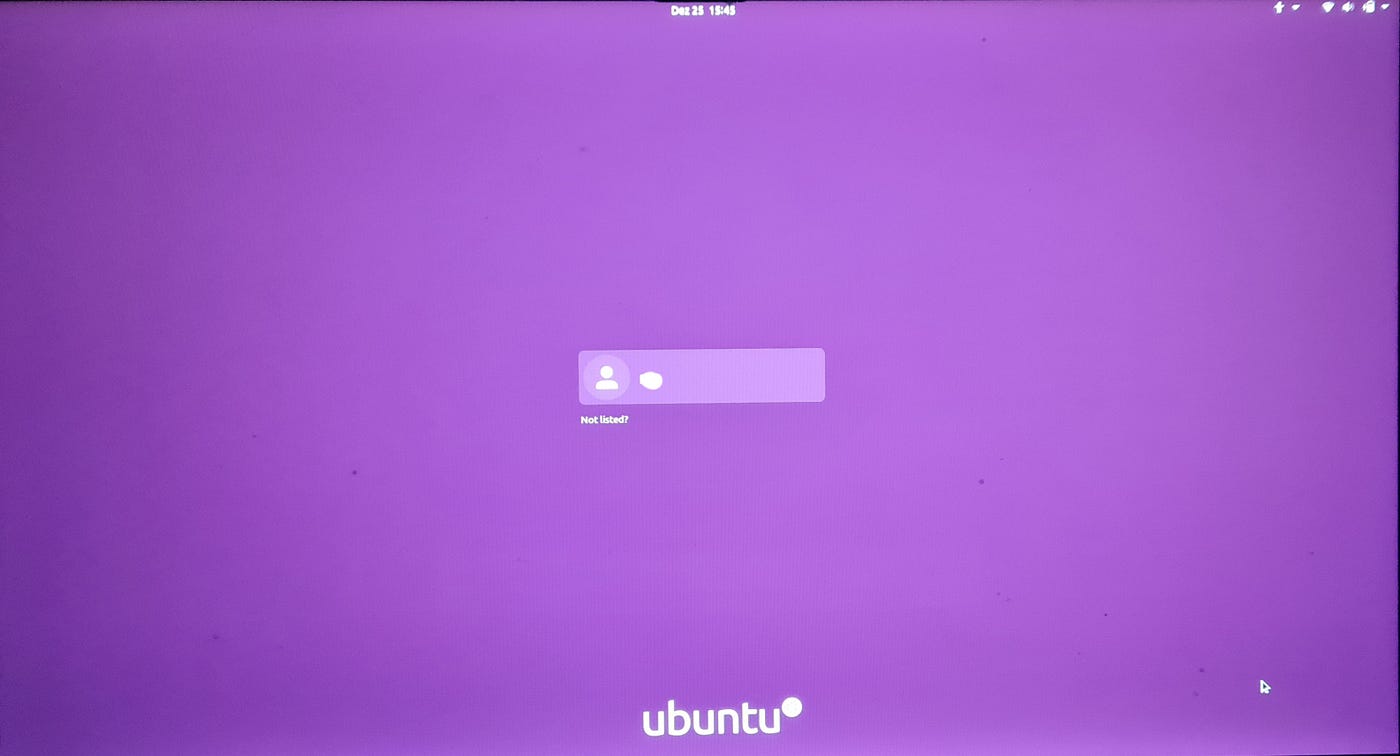
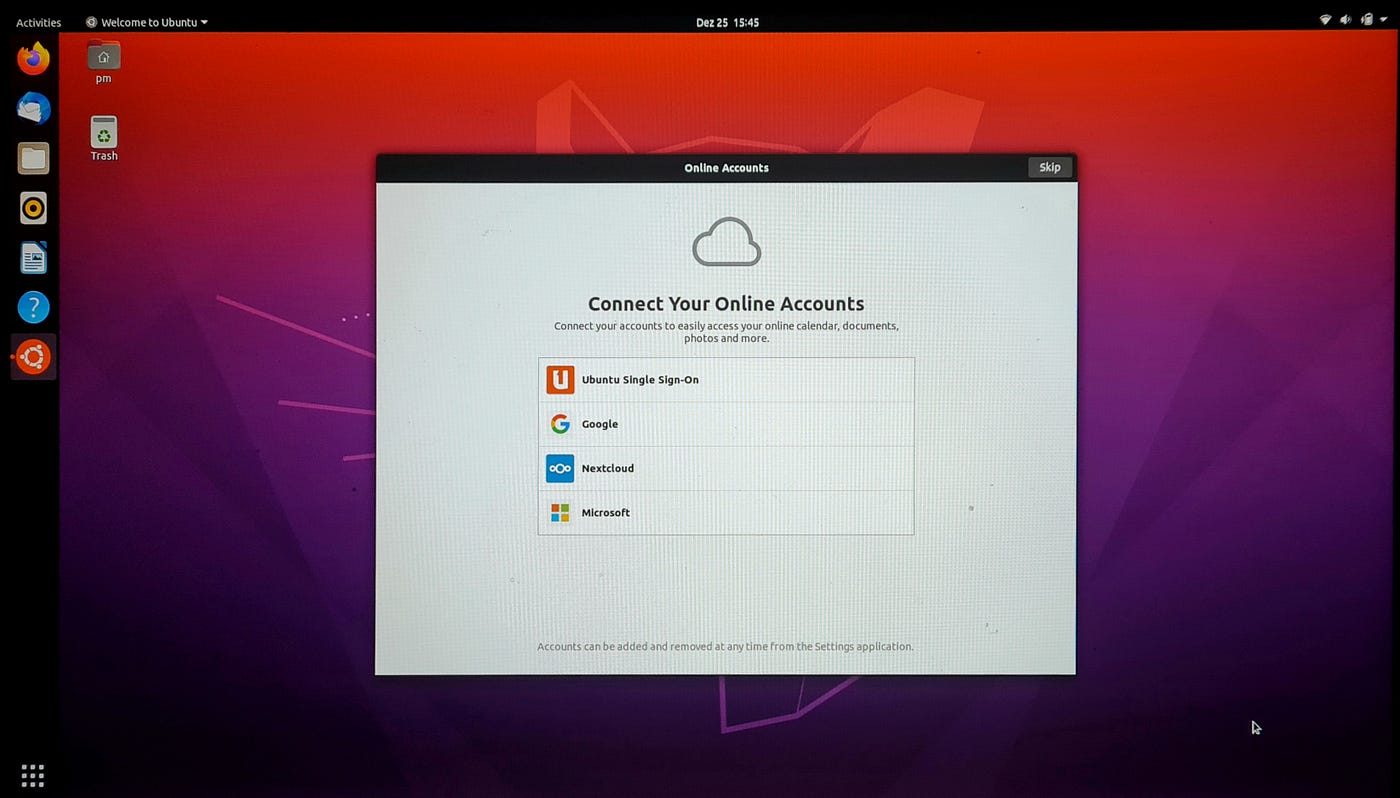
Done! Welcome to your brand new Ubuntu installation! This is the window you should see. You can create accounts and customize them the way you like.
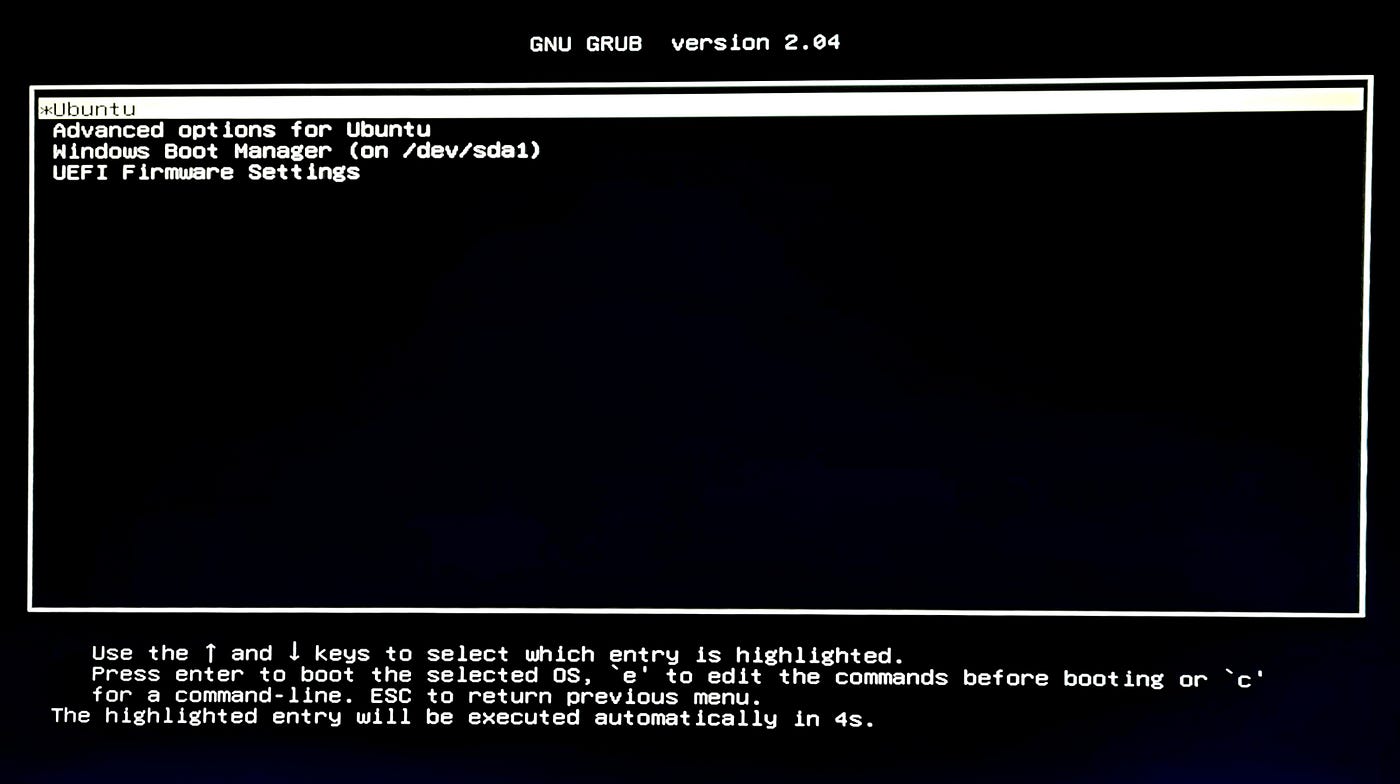
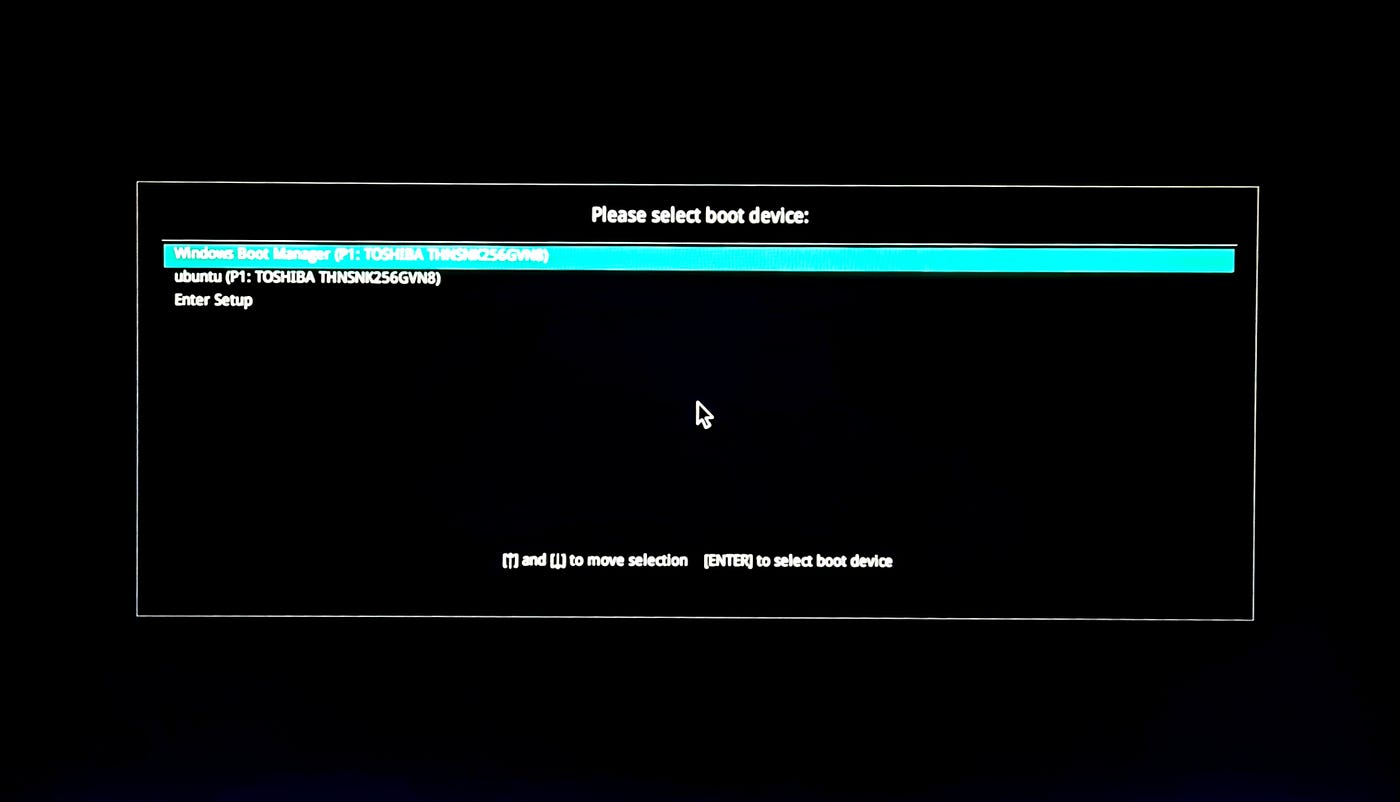
Once you restart your PC, you will automatically go into the Windows boot by default. If you want to start Ubuntu, press escape (followed by F9 to go into the boot device) at startup and you will get to select what you want to boot.
I hope you had a successful installation! If you are new to Linux, be open to the wide range of learning opportunities it offers. Here are some start-up resources:
You can also get used to common shortcuts and commands from the link below:
And as a bit advanced level, you can unleash the power of bash and type commands like a pro using the cheat-sheet in the link below:
That's it! Tinker around with your new installation, and keep a watch for my posts about configuring Ubuntu securely and other interesting tips and tricks!
Cheers!
[Note: All uncaptioned images are screengrabs from the author]
How to Install Ubuntu Os Step by Step Pdf
Source: https://towardsdatascience.com/how-to-dual-boot-windows-10-and-linux-ubuntu-20-04-lts-in-a-few-hassle-free-steps-f0e465c3aafd